
I realized recently that I’ve never discussed how I do my manicures so it’s time to remedy that.

I’ll discuss the steps I take to prep my nails and show the tools that I use.
How I Do My Manicures


I realized recently that I’ve never discussed how I do my manicures so it’s time to remedy that.
I’ll discuss the steps I take to prep my nails and show the tools that I use.

I’ve had this post brewing for months and finally dusted it off in light of the recent controversy with Z Palette. If you don’t know about it, read about it here, here, and here. Um yeah… total gong show. 😮 Z Palette is probably the most well-known of any major custom palette systems, so their social media misstep has certainly opened the door for other players to secure a larger share of the market. People are now looking for Z Palette alternatives – let’s have a look at what the options are:

I’ll be showing what I own and also list some that I know about but do not own. All prices are shown in Canadian dollars unless otherwise noted. Warning: long post and lots of photos! 😎

I thought instead of going full steam ahead to review all of my backlogged beauty products, I’d take a step back and talk about how I review beauty products. It’s something people don’t really dissect or provide a guide when you start a beauty blog.

Everyone has their own method and here’s how I approach reviewing beauty products.

Say you’ve just decluttered a whole bunch of your makeup, and you’re planning on giving them away. Or conversely, you participated in a swap, and you received gently used makeup – how do you sanitize makeup?

I’ve participated in MUA swaps way back in the day, and have given away lots of my makeup to friends. I generally keep my makeup in very clean condition, but it is still prudent to sanitize everything before you give them away. Here are some items you will need:

On this Labour Day holiday, I thought I would examine where in the world our cosmetics are made. It’s something that I always take note whenever I buy a product – I like to turn over the compact or box to find that fine print: made in xx / fabriqué au xx. For me personally, of the typical cosmetics producing countries, here’s how I rank them in terms of quality, from high to low: Disclaimer: this post in no way is a reflection of all qualities of products made in each country. I understand that there are high and low quality products made in every country. This is a generalized overview, and as such, there will be exceptions.
France – most notable for perfumes and skincare. Certain brands exclusively produce in France, staying true to their origin, such as Guerlain, Chanel, and Bourjois. I feel that these brands focus on controlling both the heritage and integrity of their products. There are also excellent pharmacy skincare brands like Nuxe, Avene and Bioderma – luckily in Canada we have easy access to these brands!

Interestingly, I noticed that my Benefit Boxed Powder Blush changed from “Made in USA” (in the shade Dallas) to “Made in France” (Hervana) and 4g less product!

When I finally understood the concept of a transition eye shadow, it upped my eye shadow blending game by tenfold. A transition eye shadow shade is one that is typically matte and slightly darker than your natural skin tone – this helps to blend the lid colour into the brow area. Most days now, I just pop on a shimmery neutral shade [taupe!] on the lid up to the crease, then I blend the edges with a transitional shade – something like this:

My blending skills are better than my photoshop skills.
It looks like I spent a lot of time with my eye look but in fact, it took less than 5 minutes. I’ve depotted some of my most used transition colours into a small z-palette so I can have a range to choose from each morning:

I would group my transition shades into neutral, warm and cool categories. I’m around NC25 so these would be suitable for skin tones that are similar.

I happen to have all of CoverGirl’s LashBlast mascaras in my stash, so I thought I’d do an overview post to show the differences between them, and my preferences.
From left to right, the order in which they were released, and their claims, they are:
Volume (orange tube) Jan 2008 “For bold, high-volume lashes”
Luxe* (deep pink tube) Feb 2009 “High-volume lashes tinted with shimmer”
Length (yellow tube) Sept 2009 “Makes lashes up to 80% longer looking vs bare lashes”
Fusion (purple tube) Apr 2010 “Volume + Length in one stroke”
24 Hour (black tube) Jan 2012 “Power hour after hour. Bold, intense volume”
Clump Crusher (green tube) Nov 2012 “200% more volume + length, zero clumps”
Full Lash Bloom (pink tube) Dec 2014 “Exceptional lash fullness that’s soft to the touch”
For this overview, I am just looking at the non-waterproof formulas. I typically do not wear waterproof mascaras for regular usage.
* I just realized that I’m missing Luxe in my stash, the darker pink tube. But I can speak to it since I’ve tried it many moons ago – it’s a gimmick to have shimmer in mascaras, it doesn’t shows up on the lashes unless there’s a spotlight on them. The only place you’ll notice the glitter is on the cotton pad when you remove your makeup at night. The Luxe version is literally the original LashBlast Volume with glitter dumped into the formula.
Keep reading for details on each type

This is part deux of “How I wash my brushes” entry. As I mentioned in that post, I used to simply lay my brushes flat to dry them after they’ve been washed. But with advancement in the technology of makeup brush care, I have improved my methods!
First up, my eye shadow brushes. I found this nifty art brush holder at the dollar store:
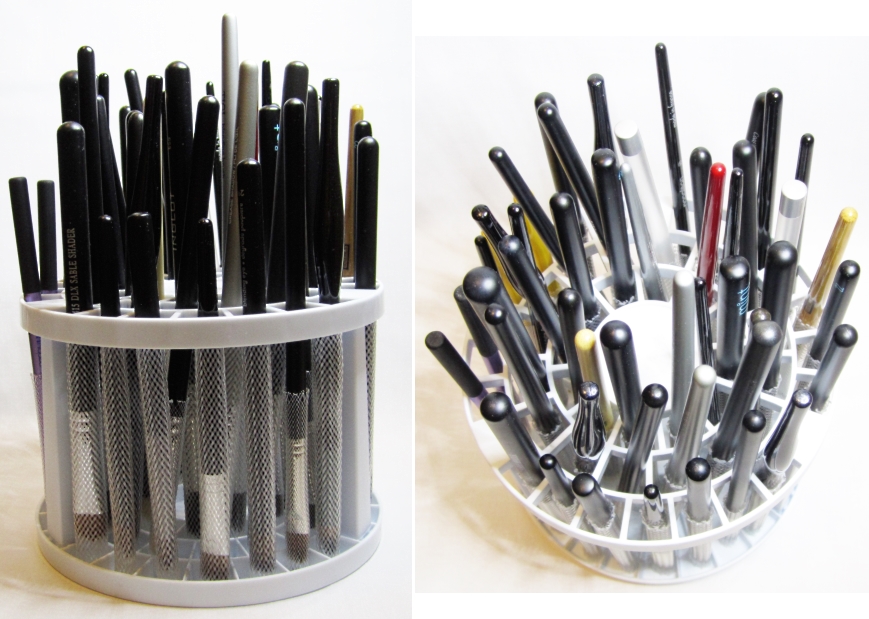
In the promotional images, the art brushes are placed with the bristles facing up for storage, but for the purpose of drying my brushes, I face them down – but with brush guards protecting the bristles. This is key. Don’t just put the brushes facing down and smooshing the bristles. The purpose of drying my brushes with the bristles facing down is to let gravity do some of the work: it prevents moisture from getting trapped in the ferrule (the metal part of the brush, where the bristles are glued in place). If moisture gets trapped in the ferrule, it can weaken the glue and cause the hairs to fall out. With this brush holder, I can fit 49 eye shadow brushes, and the whole set up can be taken apart completely for compact storage.
Continue reading

It’s officially the first week of Spring! I toyed with the idea of doing a Spring cleaning makeup purging entry… but I’m just not mentally up for sorting through my stash yet. So instead, I’ll show you how I clean my makeup brushes.
My method has developed over time. For years I simply washed my brushes with baby shampoo, laid them out on a towel and called it a day. But as more tools became available, I was able to improve my method and set up.
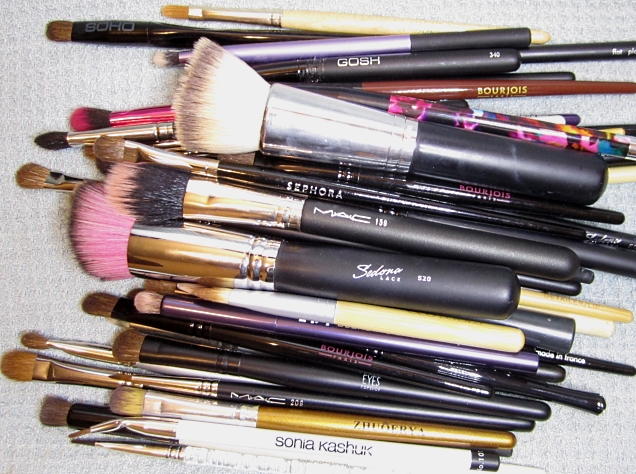
I wash (or sometimes referred to as “deep clean”) my brushes regularly – my eye makeup and foundation brushes are typically used only once and then set aside for cleaning. My sponges are also used just once and usually washed that very morning – I don’t like to let foundation dry inside the sponge which can permanently stain it. This may seem excessive but I don’t want to risk bacteria build-up which can cause cross contamination between my brushes, my makeup and my face.
